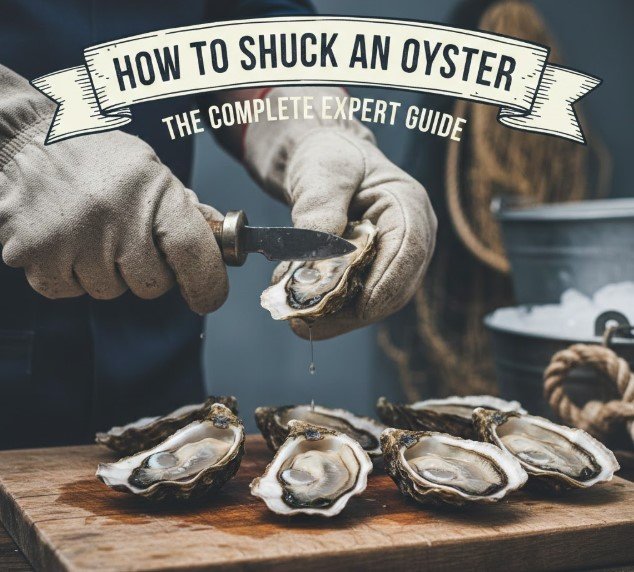
If you love fresh seafood, learning how to shuck an oyster is a skill that instantly elevates your culinary confidence. Whether you’re preparing a raw oyster platter for guests or enjoying a quiet seafood dinner at home, knowing how to open oysters safely and correctly ensures maximum flavor, presentation, and food safety.
Oysters have been prized for centuries, from ancient Roman feasts to modern fine dining establishments. Today, culinary institutions like the Culinary Institute of America teach proper oyster handling as a foundational seafood skill. At the same time, food safety guidance from agencies such as the U.S. Food and Drug Administration emphasizes safe shellfish handling to prevent contamination.
Understanding Oyster Anatomy Before Shucking
Before attempting to open an oyster, understanding its structure is critical. Oysters are bivalve mollusks with two shells connected by a hinge. Inside, a powerful adductor muscle holds the shells tightly shut. Successfully opening an oyster requires cutting this muscle cleanly without damaging the meat or spilling the flavorful liquor inside.
Oysters also have a deep bottom shell (cup side) and a flatter top shell. The hinge is typically located at the narrower end. Knowing where to insert the knife reduces force and increases safety.
Also Read:- How to Sharpen a Serrated Knife: The Complete Expert Guide for Long-Lasting Performance
How to Shuck an Oyster Step by Step
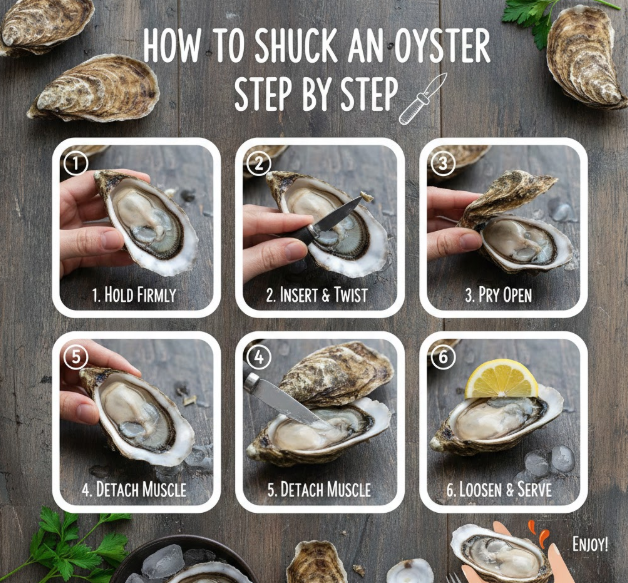
Learning how to shuck an oyster step by step ensures safety and efficiency. Precision, not strength, is the key to success.
Shucking requires controlled pressure, proper knife angle, and attention to hand placement. Always wear a cut-resistant glove or use a folded towel to protect your hand.
Step-by-Step Shucking Process
• Prepare a Stable Surface
Place the oyster cup-side down on a folded kitchen towel. The towel prevents slipping and protects your hand from injury.
• Insert the Oyster Knife into the Hinge
Using a specialized oyster knife, gently wiggle the tip into the hinge. Apply slight twisting pressure rather than pushing forcefully.
• Twist to Pop the Shell Open
Once inserted, rotate the knife handle like turning a key. This separates the shells slightly without breaking them.
• Slide the Knife Along the Top Shell
Glide the blade inside the top shell to cut the adductor muscle cleanly.
• Remove the Top Shell Carefully
Lift the shell away gently to avoid spilling liquor.
• Detach the Bottom Muscle and Serve
Slide the knife under the oyster to detach it from the bottom shell while keeping it in place for presentation.
Also Read:- How to Set the Table: The Complete Step-by-Step Guide for Every Occasion
How to Shuck an Oyster at Home Safely
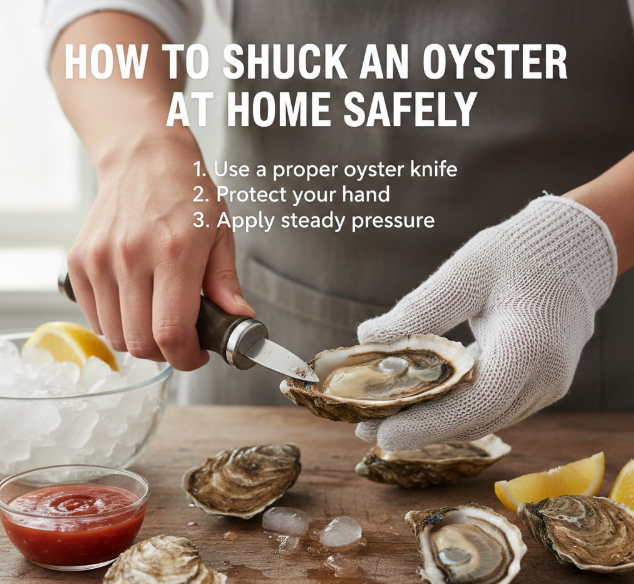
Understanding how to shuck an oyster at home involves more than technique—it requires attention to food safety and hygiene.
According to the FDA, improper shellfish handling can increase the risk of foodborne illness. Fresh oysters should be kept refrigerated at 40°F (4°C) or below and consumed within 1–2 days.
Safe Home Shucking Practices
• Inspect Oysters Before Opening
Discard any oysters with cracked shells or those that do not close when tapped.
• Keep Oysters Cold Until Use
Cold storage maintains freshness and reduces bacterial growth.
• Use Proper Protective Gear
A thick towel or cut-resistant glove protects your non-dominant hand.
• Work Over a Tray to Catch Liquor
This preserves juices and prevents mess.
• Clean Shell Fragments Immediately
Rinse gently if necessary without washing away liquor.
• Serve Immediately After Shucking
Fresh oysters taste best when served promptly.
Also Read:- How to Cook Asparagus: The Complete Guide to Perfectly Tender, Flavorful Spears
How to Shuck an Oyster with an Oyster Knife
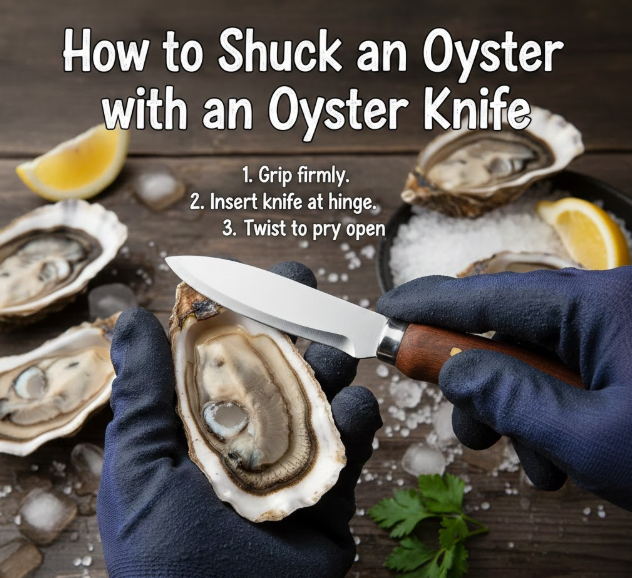
Using a dedicated oyster knife is the safest and most effective method. Oyster knives have short, sturdy blades designed for prying rather than slicing.
Professional Technique with an Oyster Knife
• Choose the Right Knife Style
Different blade shapes exist for East Coast and West Coast oysters. Select one that matches shell type.
• Grip the Knife Firmly but Carefully
Hold the handle securely, keeping fingers away from blade path.
• Insert at a Slight Angle
Avoid straight stabbing motions. Gentle rocking is more effective.
• Use Wrist Rotation Instead of Force
Twisting motion separates shells safely.
• Keep Blade Flat Against Top Shell
Prevents cutting into the oyster meat.
• Practice on Smaller Oysters First
Develop technique before tackling large, tough shells.
Also Read:- How to Cut a Pineapple: The Complete Step-by-Step Guide for Perfect Chunks and Rings
How to Shuck an Oyster with a Butter Knife
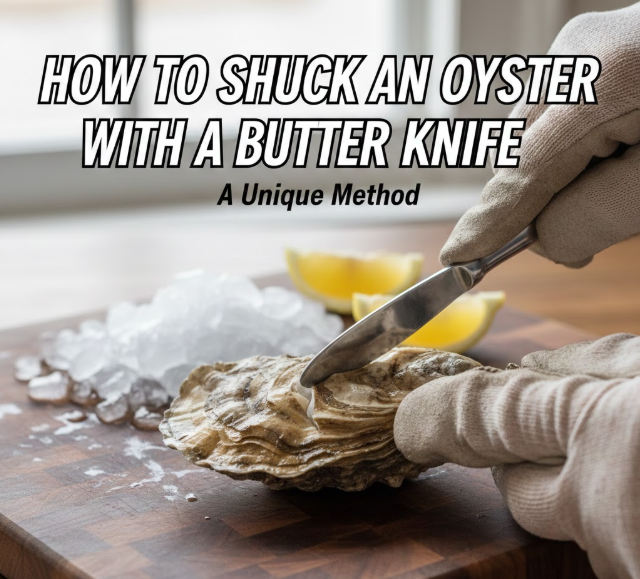
While not recommended for beginners, learning how to shuck an oyster with a butter knife can be useful in emergencies.
Butter Knife Method
• Choose a Strong, Thick Butter Knife
Thin knives may bend or break.
• Insert into Hinge Carefully
Apply slow, steady pressure.
• Twist Gently to Separate Shells
Avoid sudden force.
• Cut Muscle with Edge of Knife
Be cautious to avoid injury.
• Expect More Effort Than Proper Tools
Butter knives are not optimized for shell leverage.
• Upgrade to Oyster Knife When Possible
For safety and efficiency.
Also Read:- How to Start Knitting: The Complete Beginner’s Guide to Knitting Success
How to Shuck an Oyster Without a Shucker
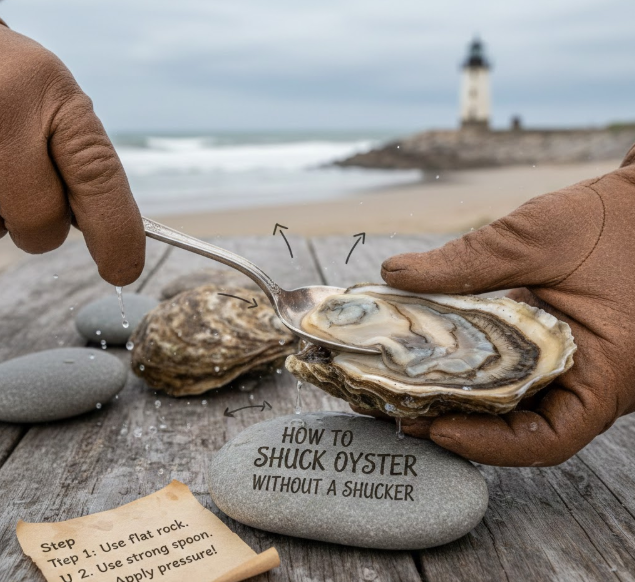
If you don’t have a traditional oyster knife, alternatives can still work with caution.
Alternative Methods
• Use a Flathead Screwdriver
Insert at hinge and twist gently.
• Steam Slightly to Loosen Shell
Light steaming for 1–2 minutes can ease opening.
• Use Thick Kitchen Gloves
Protect hands thoroughly.
• Avoid Excessive Force
Patience reduces injury risk.
• Clean Tools Thoroughly After Use
Maintain hygiene standards.
• Practice Technique Gradually
Confidence improves with repetition.
Also Read:- How to Add Fractions: The Complete Step-by-Step Guide for Students and Adults
How to Shuck an Oyster the Right Way (Professional Approach)
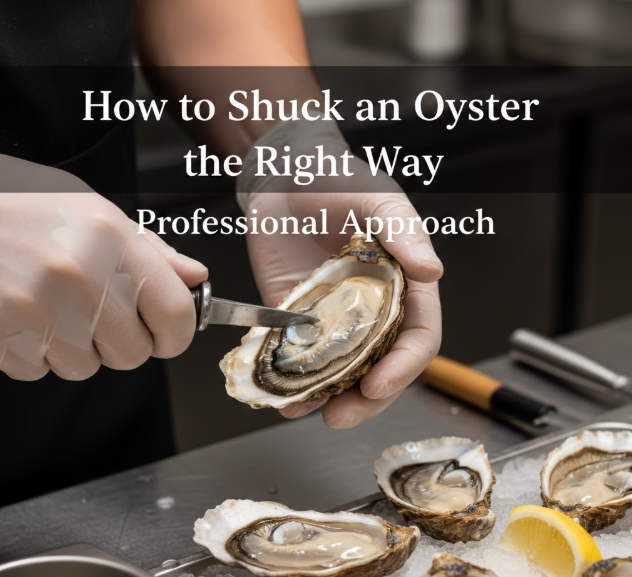
The “right way” emphasizes safety, presentation, and flavor preservation.
Professional Best Practices
• Maintain consistent hand positioning
• Keep blade angled upward to avoid meat damage
• Preserve natural liquor
• Remove shell fragments completely
• Serve over crushed ice
• Pair with proper accompaniments
Also Read:- How to Archive an Amazon Order: The Complete 2025 Step-by-Step Guide
About “How to Shuck an Oyster” Book and Print Resources
If you’re seeking structured guidance, culinary manuals and seafood cookbooks often include illustrated instructions.
Professional seafood guides and culinary textbooks provide visual diagrams that reinforce technique. Printed resources may include safety diagrams and shell anatomy references.
Also Read:- How to Address an Envelope: The Complete Step-by-Step Professional Guide
Conclusion
Mastering how to shuck an oyster transforms a seemingly intimidating task into a rewarding culinary skill. By understanding oyster anatomy, using proper tools, and following safe step-by-step techniques, you can open oysters confidently at home.
Whether using an oyster knife, butter knife, or alternative method, patience and safety are essential. With practice, you’ll preserve the oyster’s natural liquor, maintain clean presentation, and serve restaurant-quality seafood right from your kitchen.
Fresh oysters are best enjoyed immediately, paired with lemon, mignonette, or simply on crushed ice. With the guidance provided here, you can now shuck oysters the right way—safely, efficiently, and professionally.
FAQs
Is it dangerous to shuck oysters?
It can be if done improperly. Always use protective gloves and proper tools.
How do I know if an oyster is fresh?
Fresh oysters should smell like the ocean and remain tightly closed.
Can I shuck oysters ahead of time?
It’s best to shuck just before serving for optimal freshness.
Do I need special equipment?
An oyster knife and protective glove are highly recommended.
What if I spill the oyster liquor?
The oyster is still edible, but flavor may be reduced.
For More Update Visit: VallayTaxNv