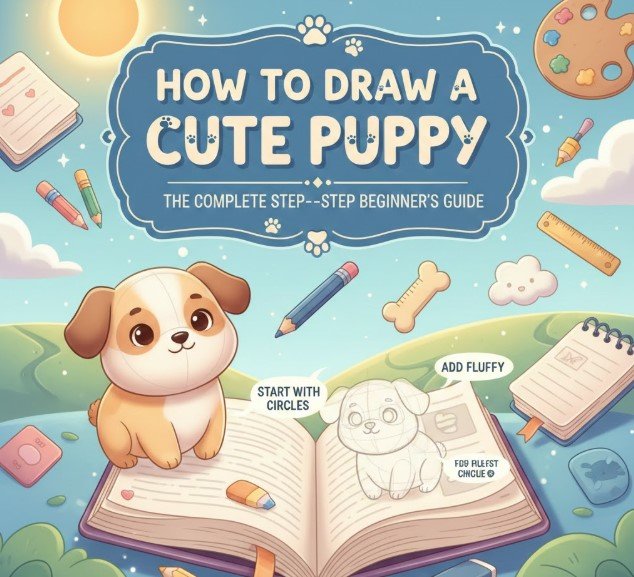
If you’ve been searching for how to draw a cute puppy, you’re about to discover a fun and rewarding artistic journey. Puppies are among the most beloved animals in the world, known for their expressive eyes, floppy ears, playful poses, and soft fur textures. Drawing a puppy combines simple shapes with gentle details, making it perfect for beginners, kids, and aspiring illustrators.
Dogs have been companions to humans for thousands of years. According to the American Kennel Club, there are over 200 recognized dog breeds worldwide, each with unique physical features that influence drawing style. Meanwhile, educational resources from the ASPCA emphasize understanding canine anatomy and expressions, which can help artists create more realistic and emotionally engaging illustrations.
Understanding Puppy Anatomy Before You Start Drawing
Before practicing how to draw a cute puppy, it’s important to understand the basic structure of a puppy’s body. Puppies differ from adult dogs in proportion: they have larger heads relative to their bodies, shorter legs, rounder features, and softer fur.
Veterinary anatomy studies highlight that puppies typically have oversized paws and rounded muzzles, contributing to their “cute factor.” Artists often exaggerate these proportions intentionally to enhance charm.
Core Structural Features of a Puppy
• Large Rounded Head Shape
Start with a circle for the head. Puppies have proportionally larger heads than adult dogs, which instantly creates a youthful and adorable appearance.
• Soft Oval Body Form
The torso can be drawn as a slightly tilted oval connected to the head. Keep the body compact and rounded.
• Short, Sturdy Legs
Unlike adult dogs, puppy legs appear shorter and slightly thicker relative to body size.
• Expressive Eyes Placement
Eyes are positioned slightly below the head’s centerline to create a softer expression.
• Floppy or Perky Ears
Ear shape defines breed style. Soft curved ears enhance cuteness.
• Small Tail Curve
Keep tail short and gently curved upward.
Understanding these proportions ensures your puppy looks realistic yet charming.
Also Read:- How to Subtract Fractions: A Complete Step-by-Step Guide for Students and Parents
How to Draw a Cute Puppy Easy for Beginners
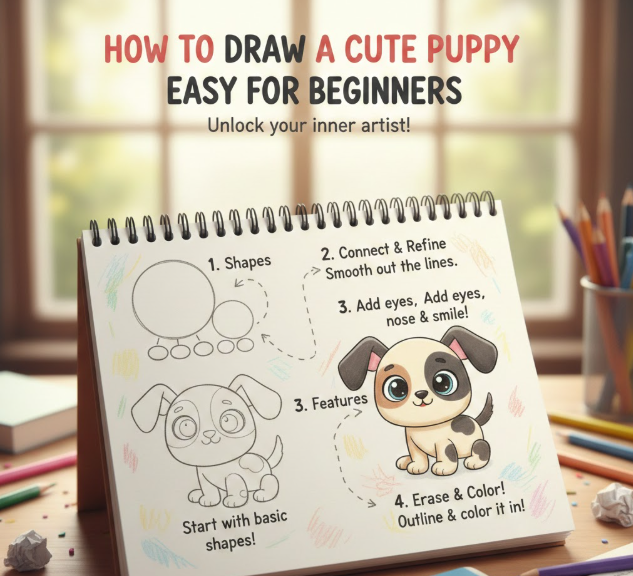
If you’re new to drawing, learning how to draw a cute puppy easy starts with simple shapes and gradual refinement.
Beginner-Friendly Puppy Drawing Method
• Draw a Basic Circle for the Head
Lightly sketch a circle as your starting guide. This will define the overall size and help position facial features evenly.
• Add an Oval for the Body
Place a slightly larger oval behind and below the head. Overlap slightly for natural connection.
• Sketch Simple Leg Shapes
Use short rectangular shapes for front legs and curved shapes for back legs.
• Attach Floppy Ears
Draw soft curved shapes hanging from both sides of the head.
• Add Facial Features
Insert two large circular eyes, a small triangular nose, and a curved smile.
• Outline and Erase Guidelines
Clean up rough lines and darken final outline.
This approach is ideal for hobby artists practicing at home.
Also Read:- How to Draw a Dinosaur Easy: The Complete Beginner-Friendly Guide
How to Draw a Cute Puppy Easy Step by Step

Breaking the drawing into organized stages builds confidence and clarity.
Step-by-Step Structured Guide
• Step 1: Construct the Head Framework
Draw a circle and lightly add cross guidelines for eye and nose placement.
• Step 2: Shape the Body Outline
Add an oval torso and define the neck connection smoothly.
• Step 3: Sketch the Limbs
Use cylindrical shapes for legs, ensuring balance and stability.
• Step 4: Define Facial Details
Position eyes evenly, add highlight circles for sparkle.
• Step 5: Add Fur Texture
Use short, curved strokes around ears and cheeks.
• Step 6: Apply Shading and Depth
Shade beneath chin and belly to create dimension.
This structured technique ensures consistency and reduces proportion mistakes.
Also Read:- How to Stretch Lower Back: The Complete Expert Guide for Pain Relief and Flexibility
How to Draw a Cute Puppy for Kids
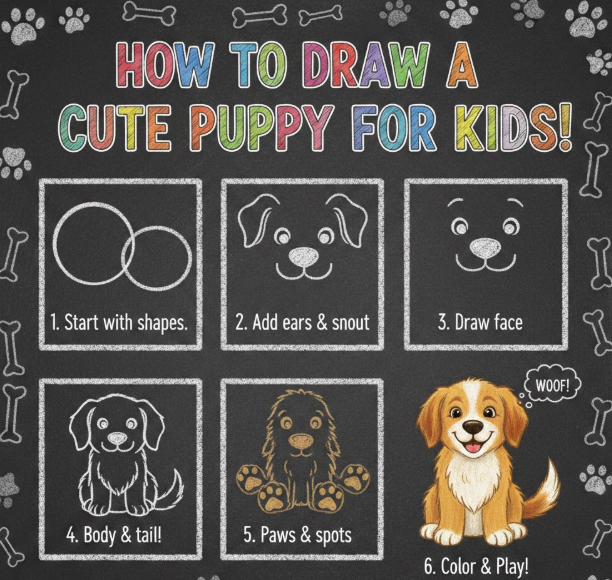
Children benefit from exaggerated features and simplified structure.
Kid-Friendly Puppy Drawing Style
• Oversized Eyes for Expression
Large circular eyes make the puppy appear friendly and playful.
• Round Cheeks and Smile
Avoid sharp angles; keep curves soft.
• Short, Stubby Legs
Keep limbs compact and simple.
• Minimal Fur Detailing
Too much detail can overwhelm young artists.
• Bright Coloring Choices
Use crayons or markers for vibrant effect.
• Encourage Creative Variations
Add bows, collars, or spots for personalization.
This style helps young learners develop hand coordination and imagination.
Also Read:- How to Replace Windshield Wipers: The Complete DIY Expert Guide
How to Draw a Cute Puppy Face
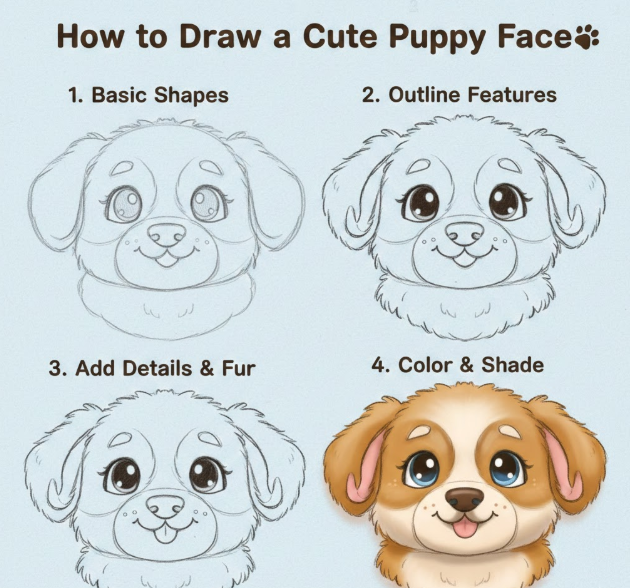
Drawing just the face requires focus on expression and symmetry.
Puppy Face Drawing Technique
• Start With Circular Head Base
Keep it perfectly rounded for softness.
• Add Eye Guidelines
Place eyes slightly lower than center.
• Draw Large Reflective Pupils
Add small white highlight circles for liveliness.
• Shape the Nose Carefully
Use small rounded triangle shape.
• Add Soft Smile Curve
Subtle upward curve enhances cuteness.
• Frame With Fluffy Fur Lines
Short strokes create texture.
Facial detail is what makes the drawing emotionally engaging.
Also Read:- How to Draw a Couch: The Complete Step-by-Step Drawing Guide
How to Draw a Cute Puppy Dog Realistically
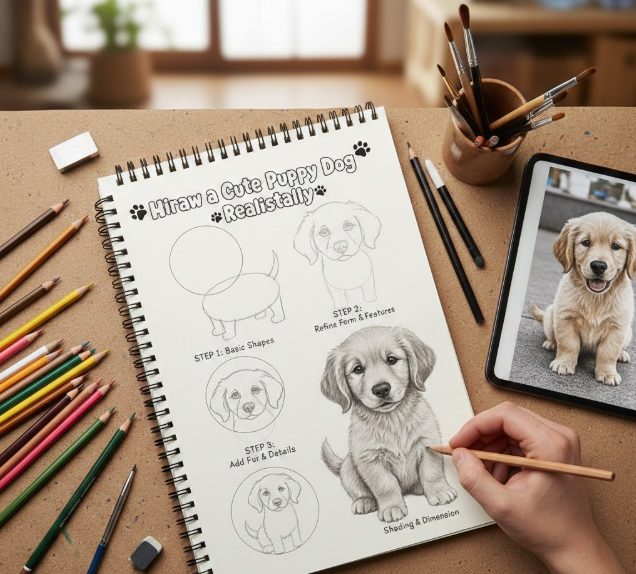
For more realism, pay attention to anatomy and shading.
Realistic Puppy Drawing Approach
• Study Breed References
Different breeds have distinct ear shapes and snout lengths.
• Use Proportional Measurements
Measure head-to-body ratio carefully.
• Add Muscle Definition Lightly
Indicate shoulder and thigh structure subtly.
• Layer Fur Texture
Use directional strokes following body contours.
• Apply Gradual Shading
Darken under chin, paws, and belly.
• Include Ground Shadow
Add base shadow for realism.
Institutions like the American Kennel Club provide visual references that help artists understand breed diversity.
Also Read:- How to Lucid Dream: Complete Beginner-to-Expert Guide
How to Draw a Cute Puppy Pictures With Personality
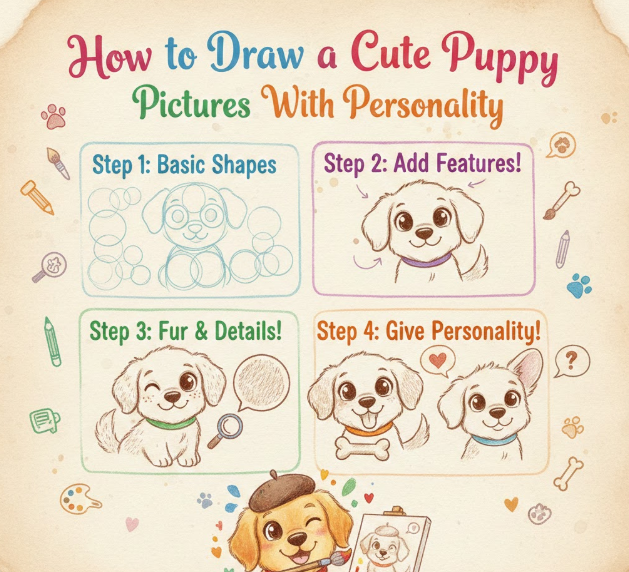
Adding personality transforms a simple sketch into a storytelling illustration.
Creative Expression Techniques
• Tilt the Head Slightly
A head tilt creates curiosity.
• Add Sparkling Eye Highlights
Multiple highlights increase liveliness.
• Include Playful Pose
Draw puppy sitting or paw raised.
• Add Accessories
Collars, bandanas, or toys enhance character.
• Incorporate Background Elements
Grass, doghouse, or ball adds context.
• Experiment With Color Palettes
Try soft browns, golden shades, or black-and-white patterns.
Creative elements make puppy pictures memorable and shareable.
Also Read:- How to Increase HDL Cholesterol: Complete Science-Backed Guide
Shading and Coloring Techniques for Soft Fur
• Use layered pencil strokes
• Blend gently for smooth fur
• Darken under ears and chin
• Highlight top of head
• Use light pressure for realism
• Maintain consistent light source
Common Mistakes to Avoid
• Drawing eyes too small
• Making legs too long
• Overcomplicating first sketch
• Ignoring symmetry
• Forgetting highlight details
• Using harsh lines instead of curves
Conclusion
Learning how to draw a cute puppy becomes simple when you focus on soft shapes, balanced proportions, and expressive features. Whether you’re drawing for fun, teaching kids, or practicing realistic sketching, starting with basic circles and ovals ensures structure and confidence.
By practicing regularly, experimenting with expressions, and applying shading techniques thoughtfully, your puppy drawings will grow more detailed and charming over time. Keep refining your lines, observing real puppies, and enjoying the creative process.
FAQs
How to draw a cute puppy easy for beginners?
Start with simple circles and add soft features gradually.
What makes a puppy look cute in drawings?
Large eyes, rounded shapes, and small nose proportions.
How long does it take to improve?
With daily practice, improvement can be seen within weeks.
Should I use reference photos?
Yes, reference improves accuracy and realism.
What tools work best?
HB pencil, eraser, colored pencils, and blending tools.
For More Update Visit: VallayTaxNv