
Wire splicing is a critical skill in electrical work that enables you to repair or extend electrical circuits. Whether you’re working on home wiring, a car’s electrical system, or underground cables, learning how to splice wires is essential for ensuring secure and safe connections. In this comprehensive guide, we will cover various splicing techniques, provide step-by-step instructions, and discuss best practices to ensure your connections are long-lasting and safe.
By the end of this article, you will have a clear understanding of how to properly splice wires, including when to use connectors, electrical tape, or other tools, and how to meet specific standards for safety and performance.
Why Learning How to Splice Wires is Important
Splicing wires is a crucial skill that allows you to maintain, repair, or extend electrical systems. Properly spliced wires can prevent electrical hazards, ensure a reliable power supply, and avoid costly repairs. Some of the key benefits of learning how to splice wires include:
• Improved electrical safety by preventing short circuits and reducing the risk of fires.
• Cost savings by enabling you to perform repairs without needing to replace expensive components.
• Increased reliability of your electrical connections, ensuring better performance.
• Flexibility to extend existing circuits or modify electrical systems according to your needs.
• Knowledge of standards for various applications, such as automotive or construction wiring.
• Convenience by offering the ability to repair wires in hard-to-reach places or in an emergency.
Also Read:- How to Send Certified Mail: A Complete Step-by-Step Guide
How to Splice Wires Together: The Basic Technique
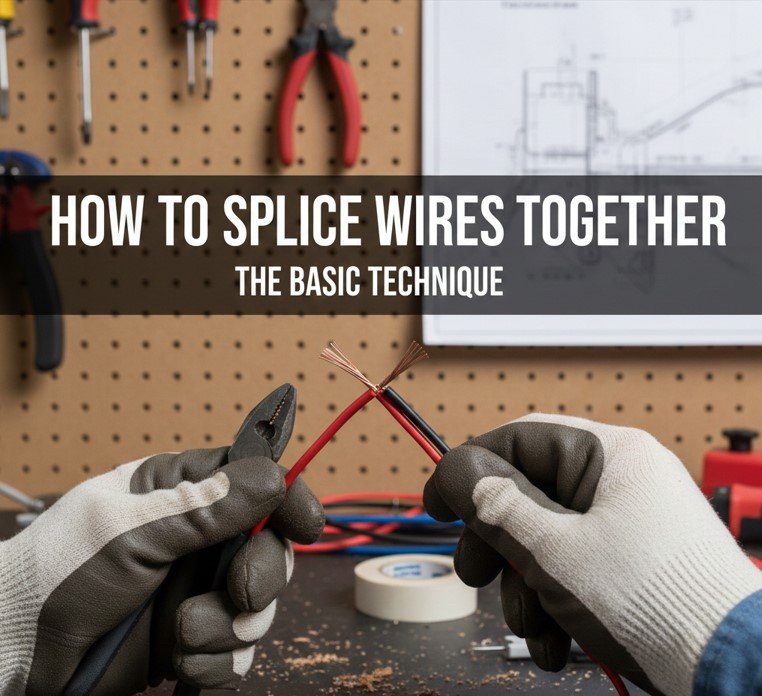
When learning how to splice wires together, the primary goal is to ensure that the electrical current flows smoothly through the splice without resistance or risk of overheating. Splicing wires together can be done using several methods, depending on the situation, but the essential process remains the same.
• Prepare the wires
Begin by stripping about 1 inch of insulation off the ends of the wires you plan to splice. Use a wire stripper to ensure you don’t damage the wire’s copper strands. Make sure to leave enough length for a solid connection.
• Twisting the wires
Align the stripped ends of the wires and twist them together. You can use your fingers to twist the copper strands in a clockwise direction to create a firm connection. This method is common for making quick repairs but is often reinforced with tape or connectors for added security.
• Using wire nuts
After twisting the wires, place a wire nut over the exposed copper and twist it on tightly. This will hold the wires in place and ensure they stay connected. The wire nut should cover all exposed copper and prevent short circuits.
• Soldering the splice
For a stronger and more permanent splice, you can solder the wires. Heat the wires with a soldering iron and apply solder to the joint. This will create a solid, conductive connection. Be sure to cover the splice with heat shrink tubing for insulation.
• Insulating the splice
Once the splice is complete, use electrical tape, heat shrink tubing, or wire connectors to insulate the exposed wire. This step prevents any accidental contact with other surfaces or wires that could lead to shorts or electric shock.
• Testing the connection
After completing the splice, use a multimeter to test the connection for continuity. This ensures that electricity flows properly through the splice and that there are no issues with the wiring.
Also Read:- How to Reset Firestick Remote: Complete Step-by-Step Guide
How to Splice Wires in a Car: Automotive Electrical Splicing
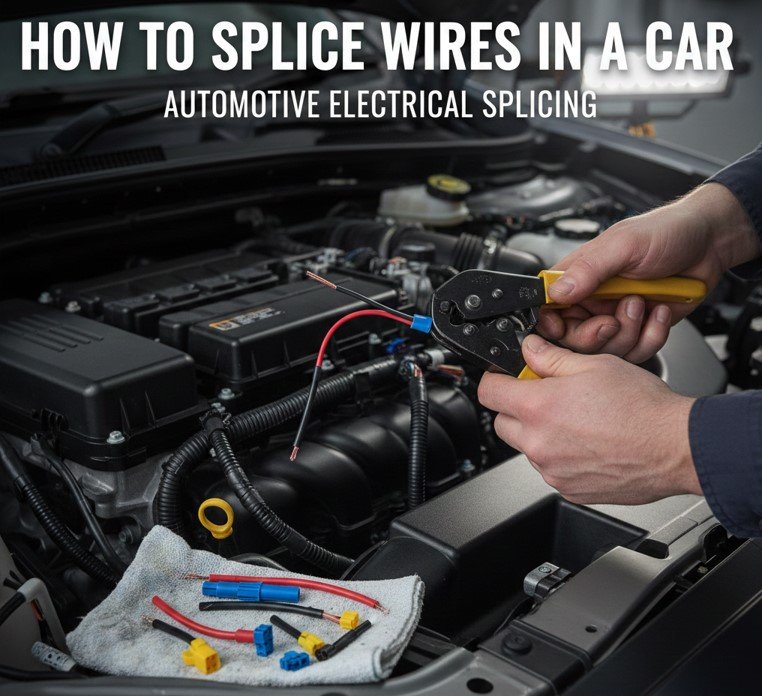
Splicing wires in a car requires precision and care due to the complex electrical systems in modern vehicles. Improper splicing can lead to malfunctions or even short circuits that may damage other electrical components. Here’s how to splice wires in a car properly:
• Identify the wires to splice
First, locate the wires you need to splice, ensuring you know their function (e.g., power, ground, signal). It’s also crucial to disconnect the battery before working on the electrical system to prevent shocks or accidental short circuits.
• Use automotive-grade wire
When replacing or splicing wires in a car, always use high-quality automotive-grade wire that can handle the temperatures and conditions within the vehicle. These wires are designed to be durable and resistant to wear.
• Cut and strip the wires
Use a wire cutter and stripper to carefully cut the wires and remove about 1 inch of insulation from each wire you’re splicing. Be mindful not to cut any other wires or components accidentally.
• Twist and secure the splice
Twist the exposed wire ends together tightly, ensuring no copper strands are left exposed. For added security, use a crimp connector or wire nut to fasten the splice. In some cases, soldering may be necessary for a permanent solution.
• Use electrical tape or heat shrink tubing
Once the wires are spliced, insulate them with electrical tape or heat shrink tubing. If using electrical tape, wrap it around the splice tightly and cover the entire exposed section. Heat shrink tubing can also provide a more professional finish.
• Test the connection
Before reassembling any parts of the car, test the connection to ensure it is secure and that the electrical system works correctly. Use a multimeter to check the voltage and continuity.
Also Read:- How to Remove Plaque from Teeth: A Complete Guide
How to Splice Wires with Electrical Tape: Quick and Efficient Splicing
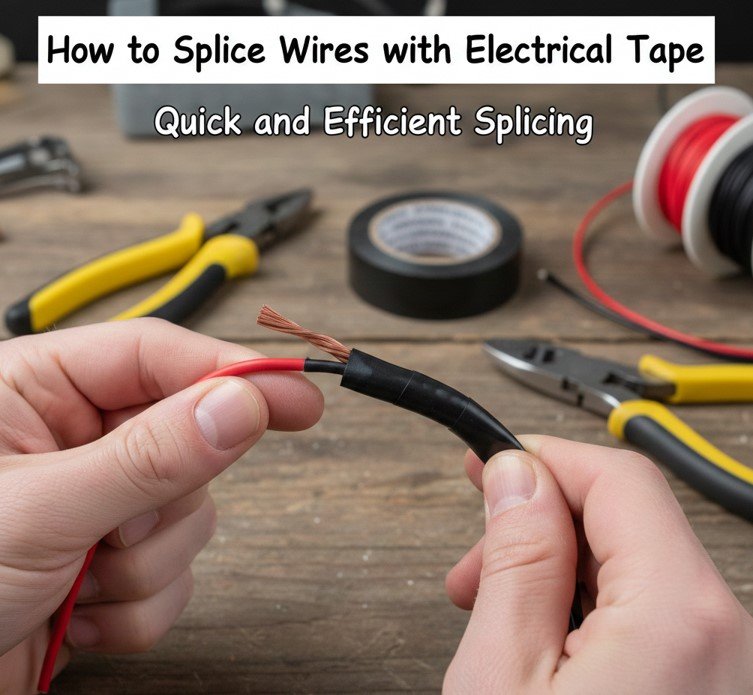
While splicing wires with electrical tape is not as permanent or secure as using connectors or soldering, it can be an effective temporary solution for minor repairs. Here’s a step-by-step guide for splicing wires using electrical tape:
• Strip the wire ends
Use a wire stripper to remove the insulation from the ends of the wires. Make sure the copper strands are exposed and free from damage.
• Align the wires
Place the stripped ends of the wires next to each other, ensuring the exposed copper is in contact with each other. You can twist the wires together for a more secure connection.
• Wrap the splice with electrical tape
Start by wrapping the exposed copper with electrical tape. Make sure the tape covers the entire splice, including the twisted wire ends. Wrap the tape tightly and overlap layers to ensure a solid seal.
• Cover the splice completely
Continue wrapping the electrical tape around the splice until the entire area is well-insulated. Be sure there is no exposed copper to prevent shorts or accidental contact with other materials.
• Test the connection
After securing the splice with electrical tape, use a multimeter to test for continuity and voltage. This will help ensure the connection is working properly before finishing the repair.
• Consider a more permanent solution
While electrical tape can provide a quick fix, consider upgrading to a more permanent solution, such as using wire nuts or connectors, for long-term durability.
Also Read:- How to Connect Laptop to Monitor: The Complete Setup Guide for Every User
How to Splice Wires Underground: Techniques for Buried Electrical Lines
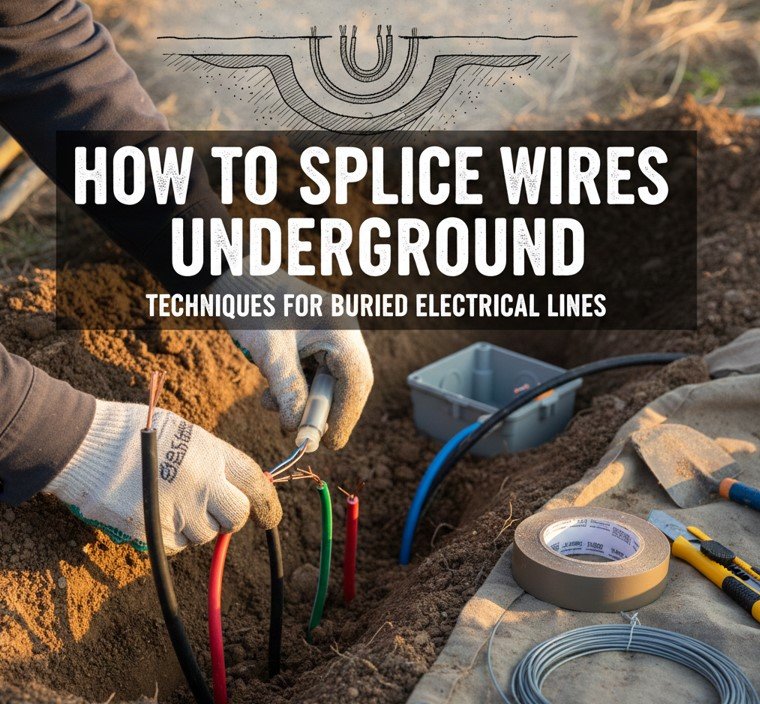
Splicing underground wires presents unique challenges, especially since the wires are typically buried and may be difficult to access. Whether you’re working on landscaping projects or underground utilities, here are the steps to splice wires underground:
• Locate the wires carefully
Ensure that you dig carefully around the wires to avoid damaging them. It’s essential to identify and expose the wires fully before proceeding with the splice. Always check local laws and regulations before digging.
• Use weather-resistant wire
When splicing underground, make sure to use weather-resistant and waterproof wires. These wires are specifically designed to withstand moisture and harsh conditions underground.
• Install waterproof connectors
For an underground splice, using waterproof wire connectors is essential to prevent water from entering the splice and causing corrosion. Choose connectors that are rated for outdoor and underground use.
• Twist and crimp the wires
Follow the same splicing steps as above by twisting the wires together and crimping them with a crimp connector. Ensure the connection is firm and tight before moving on to the next step.
• Use heat shrink tubing or gel-filled connectors
Once the splice is made, cover it with heat shrink tubing or gel-filled connectors that can expand and form a waterproof seal. This will help protect the splice from water, dirt, and other environmental factors.
• Bury the wires carefully
After securing the splice, bury the wires back underground, ensuring that they are safely covered and protected. It’s advisable to use protective conduit to further safeguard the wiring from damage over time.
Also Read:- How to Clean Gold: The Complete Expert Guide for Jewelry, Coins, and More
How to Splice Wires with Connectors: Secure and Professional Splicing
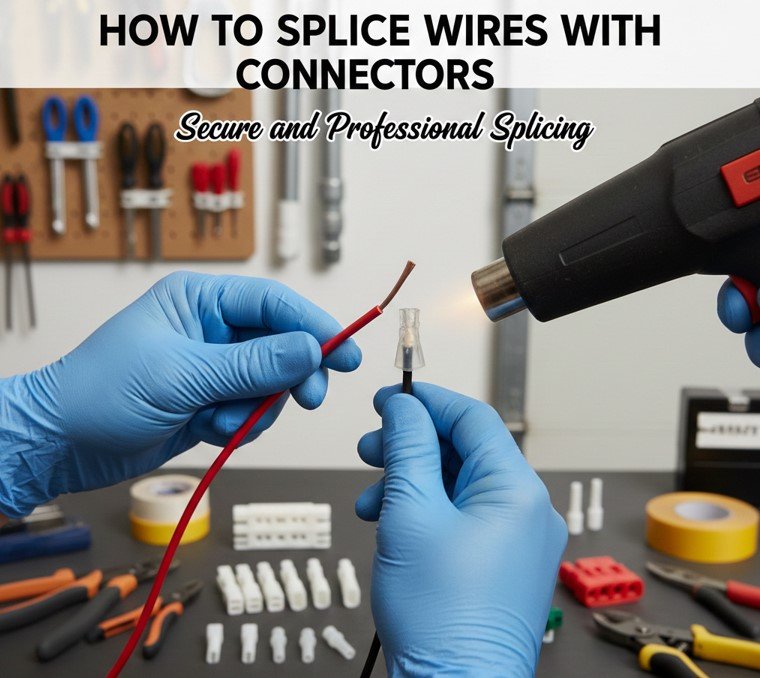
Using wire connectors is one of the most secure methods for splicing wires. Connectors ensure a stable and reliable connection, making them ideal for both automotive and home electrical applications. Here’s how to splice wires using connectors:
• Select the right connector
Choose a connector that matches the wire gauge and the intended use. For most splicing projects, butt connectors, wire nuts, or crimp connectors are commonly used.
• Strip the wires
Using a wire stripper, remove about 1 inch of insulation from the ends of the wires. Be careful not to damage the wire strands.
• Insert the wires into the connector
Slide the stripped wire ends into the connector, ensuring that they fit securely. The connector should cover the exposed copper and hold the wires in place.
• Crimp the connector
Using crimping pliers, apply pressure to the connector to secure the wire inside. Ensure the crimp is tight, and the wire won’t slip out.
• Insulate the connection
Once the connector is secure, use electrical tape or heat shrink tubing to insulate the splice. This will protect the connection from external elements and prevent accidental short circuits.
• Test the splice
After the splice is completed, use a multimeter to check the connection. Ensure there is proper continuity and that the splice functions as intended.
Also Read:- How to Trim a Beard: The Ultimate Guide for Men
How to Splice Wires in a Junction Box: Safe Wiring Connections
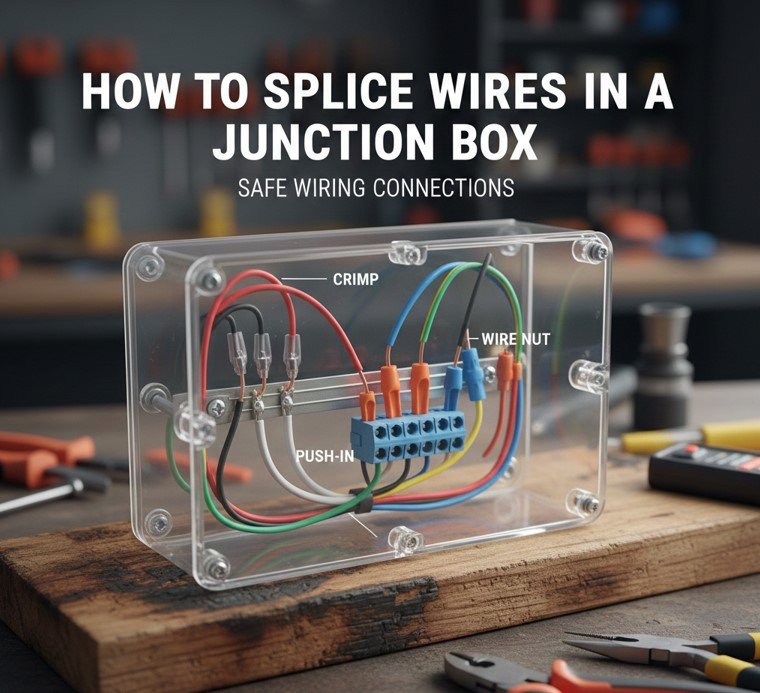
Splicing wires in a junction box is essential for securely connecting multiple wires in an organized manner. Junction boxes are commonly used in electrical systems to house and protect wire connections.
• Turn off the power
Always turn off the electricity at the main breaker before working inside a junction box to avoid electrical shock.
• Prepare the wires
Strip the wires you intend to splice, leaving enough length for a secure connection. Use a wire stripper to expose about 1 inch of copper.
• Install the connectors
Insert the exposed wires into wire connectors, such as wire nuts or crimp connectors, inside the junction box. Twist them tightly to ensure a firm connection.
• Organize the wires
Once the wires are connected, neatly arrange them inside the junction box to prevent contact between wires and the box’s metal walls, which could lead to short circuits.
• Cover the junction box
After the splicing is done, replace the junction box cover securely. This will protect the wires from damage and meet electrical code requirements.
• Test the connections
Finally, use a multimeter to test the connections inside the junction box. Ensure everything is properly connected and that the electrical flow is functioning as expected.
Also Read:- How to Start a Conversation with a Girl: The Ultimate Guide
How to Splice Wires to NASA Standards: High-Quality and Reliable Connections
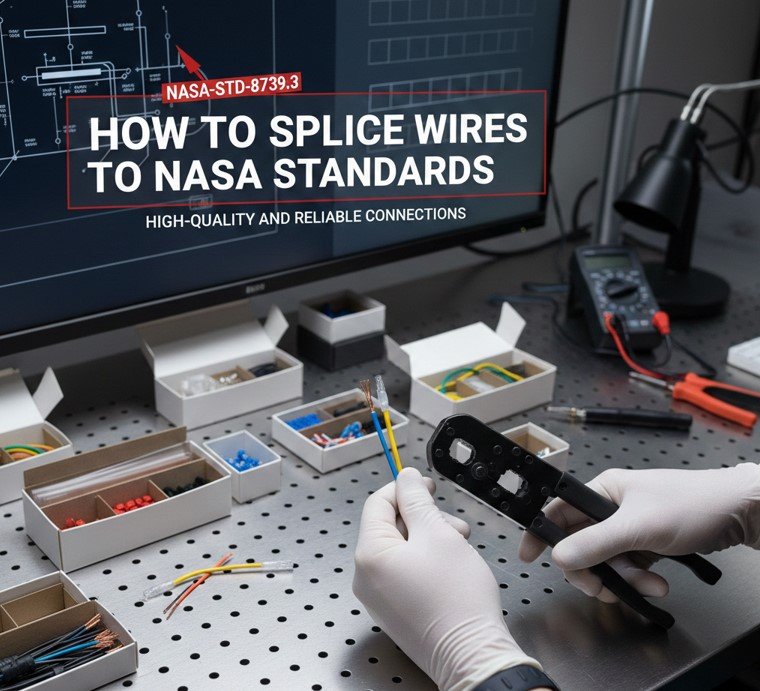
Splicing wires to NASA standards is a critical requirement for ensuring safety, reliability, and performance in aerospace applications. These high standards involve precision, cleanliness, and attention to detail.
• Use high-quality materials
When splicing wires for NASA or other aerospace applications, always use the highest quality wire, connectors, and insulation materials to meet stringent safety requirements.
• Clean the wire ends thoroughly
Before making any connections, clean the wire ends to remove any contaminants or oxidation. This ensures a secure and conductive splice that meets NASA’s strict requirements.
• Solder the connection
For NASA-level splicing, soldering is often required to ensure a solid, durable connection. Use a soldering iron and high-quality solder to make a seamless connection.
• Use precise crimping techniques
Crimp connectors must be applied with exact pressure to ensure reliable performance. Use calibrated crimping tools to meet the exact crimping force specified by NASA standards.
• Verify electrical conductivity
After splicing, test the connection to ensure proper electrical conductivity. NASA standards require extremely low resistance at the splice point.
• Encapsulate the splice
Finally, encapsulate the splice with appropriate insulation and protective coverings, such as heat shrink tubing, to safeguard against environmental factors like temperature extremes and moisture.
Also Read:- How to Smoke a Turkey: Ultimate Guide for Beginners and Experts
Conclusion
Learning how to splice wires is a valuable skill that can be applied across a variety of fields, from automotive repair to home electrical systems and even high-tech aerospace applications. By following the proper techniques for wire splicing, such as using connectors, electrical tape, or soldering, you can ensure that your electrical systems are safe, reliable, and efficient.
FAQs
What tools do I need to splice wires?
Common tools for wire splicing include wire strippers, crimping pliers, a soldering iron, wire cutters, and electrical tape or heat shrink tubing.
Can I splice wires without a connector?
While it’s possible to twist wires together, using connectors or soldering provides a more secure and reliable splice, especially for long-term use.
Is wire splicing safe?
Yes, as long as proper safety precautions are followed, including turning off power sources and using the right materials for the job.
How do I know if my wire splice is working?
Use a multimeter to test for continuity and ensure that there are no short circuits or resistance issues.
Can I splice wires underground?
Yes, but always use waterproof and durable connectors and insulation materials designed for underground use.
For More Update Visit: VallayTaxNv