
Pressing flowers is a timeless craft that preserves nature’s beauty for art, decor, gifts, and keepsakes. Learning how to press flowers allows you to capture blooms at their peak and transform them into long-lasting decorations, greeting cards, framed art, or scrapbook embellishments.
Pressing flowers might seem simple, but achieving vibrant, flat, and well-preserved flowers requires careful selection, preparation, and proper technique. Factors like moisture, flower type, and pressing method influence the final result.
This comprehensive guide explores pressing flowers in books, pressing flowers in frames, preventing browning, and pressing flowers at home, giving you all the tools and knowledge to create professional-quality pressed flowers.
Whether you are a beginner, a craft enthusiast, or an artist, mastering these methods ensures your flowers remain colorful, flat, and beautiful for years.
Understanding Flower Pressing: What It Is and Why It Matters
Flower pressing is the process of flattening flowers and leaves while drying them to preserve their color, shape, and beauty. Unlike dried flowers, pressed flowers maintain a two-dimensional appearance, making them perfect for artwork and paper crafts.
Pressed flowers are used in:
- Greeting cards
- Scrapbooks
- Wall art
- Bookmarks
- Jewelry
Pressing flowers captures their natural details while extending their lifespan.
Key concepts in flower pressing:
. Flower selection affects outcome
Choose fresh, vibrant flowers with minimal moisture. Flowers with thinner petals, such as violets, daisies, and pansies, press better than thick or fleshy flowers.
Flowers picked at their peak retain the most color. Thick blooms may take longer to dry and can brown.
. Timing matters
Press flowers as soon as possible after cutting.
Freshly picked blooms retain color, shape, and fragrance. Delayed pressing increases wilting or discoloration.
. Proper technique preserves color and shape
Flower pressing involves flattening and absorbing moisture gradually.
Using the right method prevents curling, browning, or mold growth.
. Environment plays a role
A dry, ventilated area ensures successful pressing.
Humidity slows drying and increases the risk of mold.
. Patience is essential
Pressing flowers takes days to weeks depending on method and flower type.
Rushing the process can cause browning or distortion.
Also Read:- How to Paint Kitchen Cabinets: Complete Step-by-Step Guide for a Professional Finish
How to Press Flowers in a Book
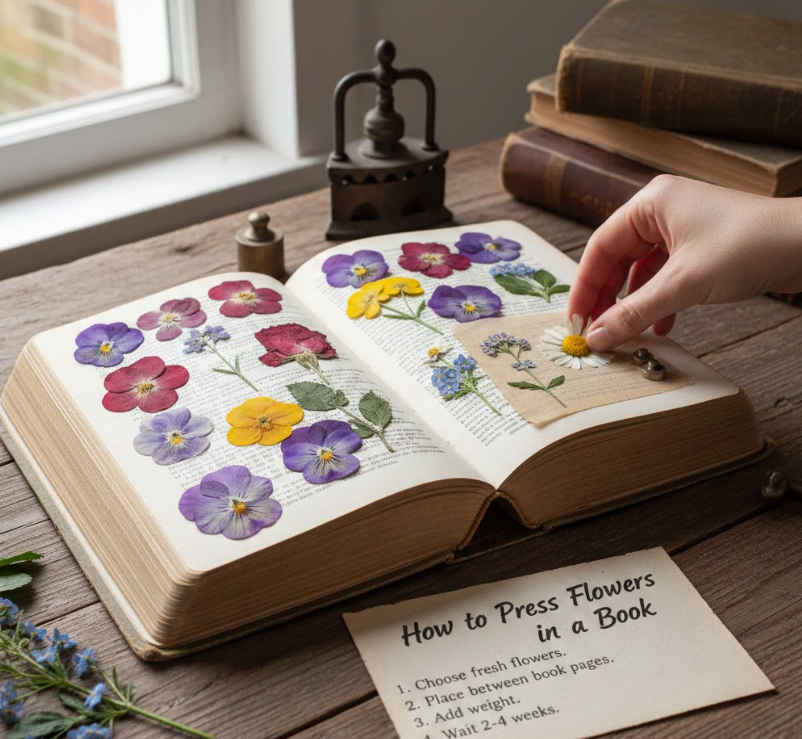
Pressing flowers in a book is one of the oldest and simplest methods, requiring minimal tools. This method works best for thin-petaled flowers and small leaves.
Steps for book pressing:
. Select a heavy, thick book
Choose a hardcover book with enough pages to accommodate your flowers without crowding.
The weight ensures even pressure.
. Place flowers between parchment or blotting paper
Wrap flowers in parchment, wax paper, or coffee filters to prevent moisture from damaging the book pages.
This also keeps petals from sticking.
. Arrange flowers carefully
Position flowers flat and avoid overlapping petals.
Proper arrangement ensures uniform drying and prevents curling.
. Close the book and add extra weight
Place additional books or a weight on top to apply consistent pressure.
Even pressure creates flat, intact flowers.
. Wait 1–3 weeks
Thin petals may dry in a week, thicker petals may take longer.
Check periodically to ensure no mold develops.
. Remove and store pressed flowers
Once dry, carefully remove flowers using tweezers.
Store in airtight containers or use immediately for crafts.
Also Read:- How to Lower A1C: Complete Medical and Natural Guide for Better Blood Sugar Control
How to Press Flowers in a Frame

Framing pressed flowers allows you to display their beauty as decorative art. This method requires more precision to maintain shape and color.
Steps for frame pressing:
. Choose fresh, vibrant flowers
Pick flowers with bright colors and minimal moisture.
Thin petals flatten more easily, making them ideal for framing.
. Press flowers first
Use a traditional pressing method for 1–3 weeks before framing.
Flowers must be completely dry to avoid mold.
. Select a frame and background
Choose a frame with glass and a backing board.
White, black, or colored backgrounds enhance the flower’s contrast.
. Arrange flowers aesthetically
Use tweezers to position flowers without touching petals too much.
Experiment with symmetry, color, and composition.
. Secure flowers with adhesive
Use archival glue or double-sided tape for long-lasting hold.
Avoid liquid glue that can discolor petals.
. Assemble the frame and seal
Place glass over flowers and close the frame carefully.
Display away from direct sunlight to preserve colors.
Also Read:- How to Scan a Document: The Complete Beginner-to-Expert Guide
How to Press Flowers Without Turning Brown
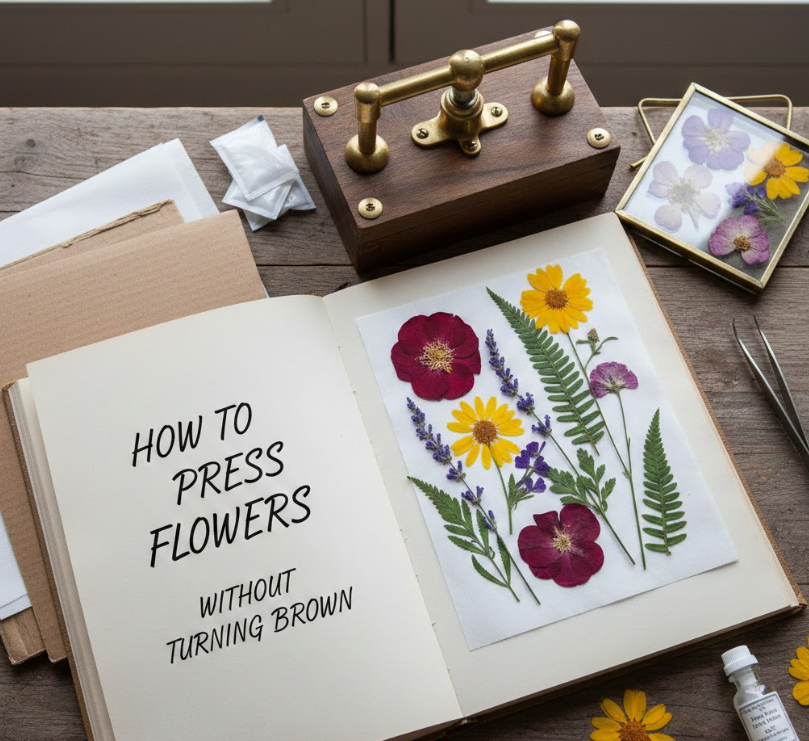
Preventing browning is crucial for creating beautiful pressed flowers. Browning often occurs due to moisture, improper drying, or exposure to sunlight.
Tips to avoid browning:
. Pick flowers at peak freshness
Avoid wilted, overripe, or damaged blooms.
Fresh flowers retain color longer.
. Use absorbent materials
Parchment paper, blotting paper, or coffee filters absorb moisture efficiently.
Even moisture absorption prevents mold and discoloration.
. Avoid direct sunlight
Press flowers in a shaded, ventilated area.
Sunlight can bleach or brown petals.
. Apply gentle heat if necessary
Some methods use a warm iron or microwave press for faster drying.
Ensure temperature is low to prevent burning.
. Check moisture levels
Remove flowers once completely dry.
Residual moisture causes browning or mold.
. Use silica gel for sensitive flowers
Silica gel absorbs moisture quickly and preserves vivid colors.
Ideal for roses, orchids, or thick petals.
Also Read:- How to Wash a Car: The Complete Step-by-Step Professional Guide
How to Press Flowers at Home
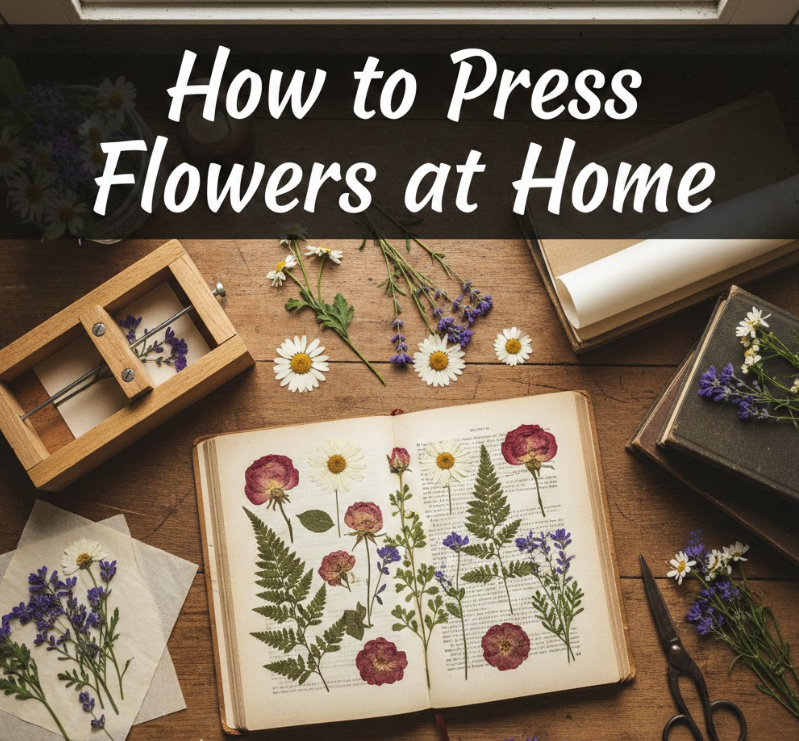
Pressing flowers at home is accessible and requires minimal tools. You can use books, DIY presses, or household items to preserve your flowers for crafts and decoration.
Home pressing methods:
. Traditional book pressing
Place flowers between parchment paper in a heavy book with added weight.
Simple, affordable, and effective.
. DIY wooden press
Use two wooden boards, screws, and cardboard layers to create adjustable pressure.
Provides consistent pressure and faster drying.
. Microwave flower pressing
Use microwave-safe paper and light weight for rapid drying.
Flowers dry in minutes but require careful monitoring to prevent burning.
. Pressing with iron
Place flowers between paper and iron on low heat.
Quick method for small, thin petals.
. Silica gel drying
Cover flowers in silica gel crystals to preserve color and shape.
Excellent for thick or delicate blooms.
. Air drying and hanging
Thin flowers and leaves can also air dry on a ventilated surface.
Slower but effective for some species.
Creative Uses for Pressed Flowers
Pressed flowers have endless creative applications in crafts and home decor.
- Greeting cards and invitations
- Scrapbooking and journals
- Framed wall art
- Bookmarks and resin jewelry
- Gift embellishments
Using pressed flowers in art adds a personal and natural touch.
Also Read:- How to Use PowerPoint: The Complete Beginner-to-Expert Guide
Conclusion
Learning how to press flowers allows you to preserve nature’s beauty and create long-lasting decorative pieces. Whether using a book, frame, or home DIY method, proper preparation, selection, and technique prevent browning and ensure vibrant results.
Pressed flowers offer versatile creative possibilities, from framed artwork to personalized gifts. By following these methods, you can confidently press flowers at home like a professional, preserving their colors and charm for years to come.
FAQs
How long does it take to press flowers?
Typically 1–3 weeks depending on thickness and method.
Can all flowers be pressed?
Thin-petaled flowers press best; thick blooms may require silica gel.
How do I prevent flowers from turning brown?
Use fresh flowers, absorbent paper, avoid sunlight, and ensure complete drying.
Can I press flowers without a book?
Yes, wooden presses, microwave pressing, or silica gel work well.
For More Update Visit: VallayTaxNv