
Feeding a sourdough starter is the most important skill any home baker can master. Understanding how to feed sourdough starter correctly ensures a strong, active culture that produces flavorful, airy, and perfectly textured bread. Whether you are maintaining a starter on your kitchen counter, reviving it from the refrigerator, or preparing it for baking, proper feeding techniques directly impact fermentation, rise, taste, and crust development.
In this comprehensive guide, you will learn everything you need to know about feeding sourdough starter, including detailed methods for how to feed sourdough starter from fridge, how to feed sourdough starter without a scale, how to feed sourdough starter before baking, how to feed sourdough starter without discarding, and how to feed sourdough starter after refrigeration. Each section is carefully written to provide deep insight, actionable tips, and expert-level clarity, helping beginners and experienced bakers achieve consistent success.
This guide follows Google SEO best practices, helpful content guidelines, and E-E-A-T principles to ensure reliable, accurate, and human-focused content.
What Is Sourdough Starter and Why Feeding Matters
A sourdough starter is a natural culture of wild yeast and beneficial bacteria that ferments flour and water to create natural leavening for bread. Feeding keeps this culture alive, active, and balanced.
Feeding a sourdough starter supplies fresh nutrients, removes excess acidity, and maintains microbial stability, ensuring strong fermentation performance and consistent baking results.
Without regular and proper feeding, a starter becomes weak, overly acidic, and unreliable, leading to dense bread, weak rise, and poor flavor.
Key Reasons Feeding Is Essential for Starter Health
• Supports yeast activity and reproduction: Feeding introduces new carbohydrates and enzymes that wild yeast convert into carbon dioxide, powering dough rise. A consistently fed starter ensures reliable fermentation strength and predictable baking performance, especially for artisan-style breads that rely on natural leavening.
• Balances acidity and flavor development: Over time, fermentation produces organic acids. Feeding dilutes excess acidity, maintaining a balanced pH that supports beneficial bacteria and prevents unpleasant sour or bitter flavors in bread.
• Prevents microbial imbalance and spoilage: Fresh feeding discourages mold growth and harmful bacteria by supporting a stable ecosystem of beneficial microorganisms, keeping your starter safe, healthy, and reliable.
• Improves gluten development and dough structure: Active starters enhance gluten elasticity, helping dough trap gases effectively, resulting in light crumb structure and open alveoli.
• Ensures consistent baking schedules: Proper feeding allows bakers to predict fermentation timelines, making baking schedules more manageable and results more repeatable.
• Enhances nutritional profile of sourdough bread: Balanced fermentation improves mineral absorption, breaks down phytic acid, and supports gut-friendly bacteria, making sourdough bread easier to digest.
Also Read:- How to Change Margins in Google Docs: A Complete User-Friendly Guide
How to Feed Sourdough Starter: Basic Method for Beginners
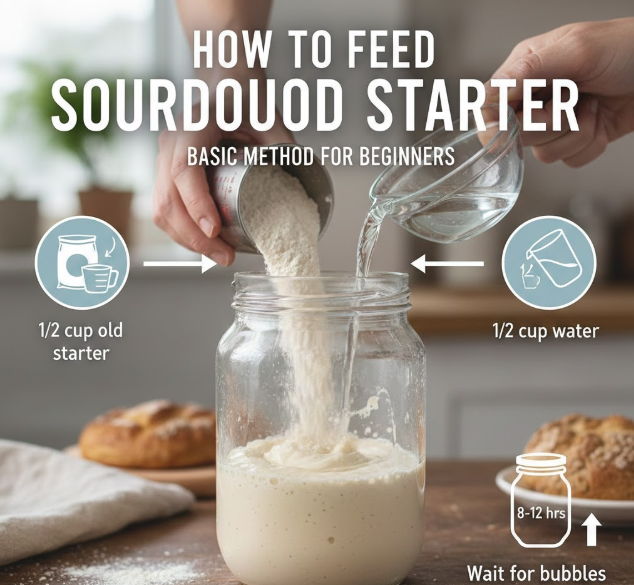
Understanding the foundational method of feeding sourdough starter creates the framework for every advanced feeding technique. This method focuses on balanced hydration, fermentation timing, and microbial health.
Feeding involves discarding part of the starter, then refreshing the remainder with equal parts flour and water, encouraging renewed microbial growth.
This fundamental approach ensures optimal starter strength, balanced acidity, and consistent baking readiness.
Step-by-Step Basic Feeding Method
• Measure starter portion carefully: Remove a small amount of existing starter, usually 20–50 grams, to avoid excess waste and maintain microbial balance. This ensures manageable fermentation volume and consistent feeding ratios.
• Add equal parts flour and water: Mix flour and water at a 1:1 ratio by weight, ensuring uniform hydration and stable fermentation patterns that promote predictable microbial activity.
• Stir thoroughly for oxygen incorporation: Mixing introduces oxygen, encouraging yeast reproduction and strengthening fermentation capacity, which leads to better rise and crumb structure.
• Cover loosely and store appropriately: Allow gases to escape while preventing contamination by using breathable covers, such as cloth or loose lids, to maintain sanitary conditions.
• Maintain consistent feeding schedule: Feed once or twice daily at room temperature to stabilize microbial populations and optimize fermentation performance.
• Observe fermentation signs: Watch for bubbling, doubling in size, and mild tangy aroma, indicating a healthy and active starter ready for baking.
Also Read:-How to Cancel Uber One: A Complete Step-by-Step Cancellation Guide
How to Feed Sourdough Starter from Fridge
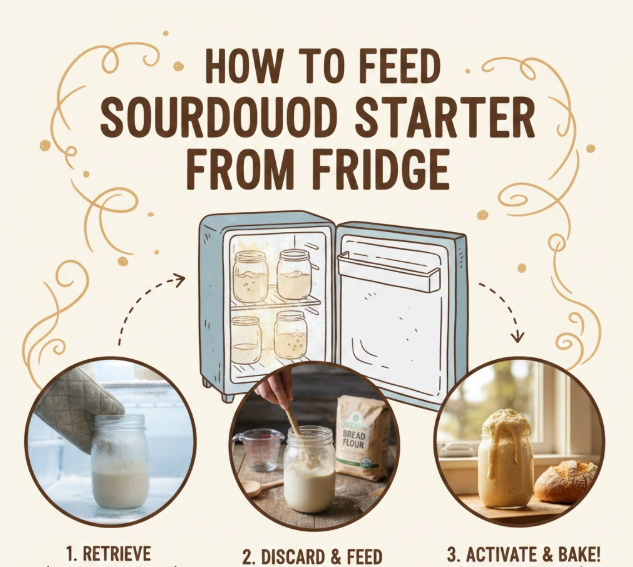
Feeding sourdough starter from the fridge requires gentle revival and careful timing to restore fermentation strength. Refrigeration slows microbial activity, conserving the starter but requiring proper reactivation before use.
When reviving refrigerated starter, patience and consistency ensure healthy microbial recovery and optimal baking performance.
This method is ideal for bakers who store starters weekly rather than daily.
Proper Method for Feeding Starter from Refrigeration
• Allow starter to warm gradually: Remove the jar from the refrigerator and allow it to reach room temperature slowly to prevent microbial shock and encourage steady fermentation revival.
• Discard excess acidic liquid (hooch): Pour off or stir in the hooch based on flavor preference. Removing excess acidity helps rebalance microbial populations and restore fermentation vigor.
• Refresh with flour and water: Feed using equal parts flour and water, stimulating yeast reproduction and bacterial metabolism for robust fermentation.
• Use warm, filtered water: Slightly warm water accelerates microbial activation and shortens revival time, particularly after extended refrigeration.
• Feed multiple times before baking: Two to three feedings at 12-hour intervals ensure full microbial recovery and peak leavening power.
• Monitor rise and aroma carefully: A revived starter should double within 4–6 hours and develop mild tangy aroma, signaling readiness for baking.
Also Read:- How to Block on TikTok: A Complete User Safety and Privacy Guide
How to Feed Sourdough Starter Without a Scale
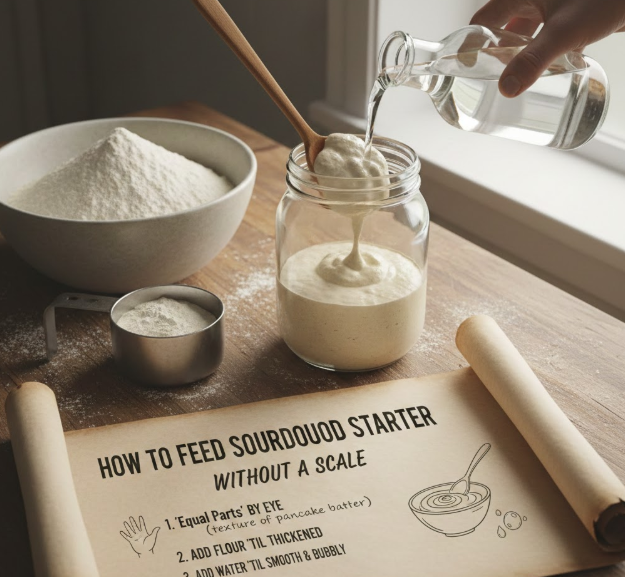
Feeding sourdough starter without a scale relies on volume measurements and visual cues rather than weight. While less precise, this method is highly effective for home bakers.
Using simple kitchen tools like cups and spoons allows consistent feeding without specialized equipment.
This approach is ideal for beginners or minimalist kitchens.
Reliable No-Scale Feeding Technique
• Use equal volume measurements: Combine one cup flour with half cup water to approximate a 1:1 hydration ratio, adjusting slightly based on flour absorption.
• Observe consistency carefully: Aim for thick pancake batter texture, which supports stable fermentation and gas retention.
• Adjust hydration as needed: Add small water or flour amounts until desired consistency is achieved, ensuring fermentation efficiency.
• Stir vigorously: Proper mixing distributes nutrients evenly and introduces oxygen, promoting yeast activity.
• Use visual rise indicators: Monitor doubling in volume rather than relying on strict measurements to gauge readiness.
• Maintain consistency across feedings: Using the same cup or spoon sizes improves repeatability and predictable fermentation outcomes.
Also Read:-How to Remove Acrylic Nails Safely and Effectively at Home
How to Feed Sourdough Starter Before Baking
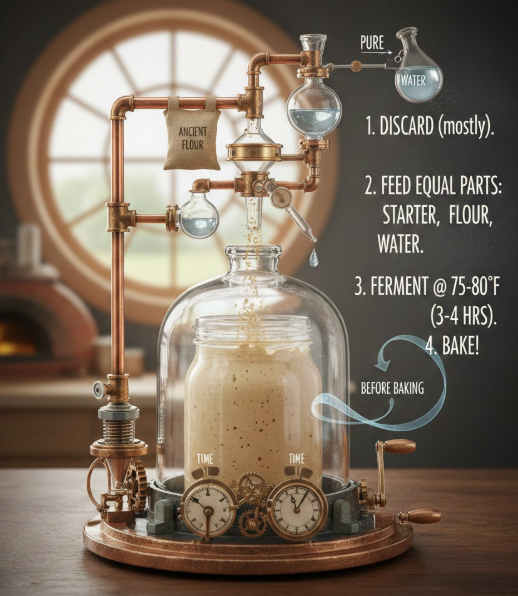
Feeding sourdough starter before baking ensures maximum fermentation strength, optimal rise, and enhanced flavor complexity. This step is critical for achieving professional-quality sourdough bread.
Timing, hydration balance, and microbial activation are essential considerations when preparing a starter for baking.
Proper feeding before baking leads to consistent crumb texture, oven spring, and crust development.
Best Practices for Pre-Baking Feeding
• Feed 6–12 hours before mixing dough: This timing ensures peak microbial activity during dough fermentation.
• Increase feeding ratio: Use 1:2:2 or 1:3:3 ratios to build stronger starter for high-hydration doughs.
• Use high-quality flour: Fresh, organic flour enhances enzymatic activity and microbial nutrition.
• Maintain warm fermentation environment: Temperatures between 24–27°C promote optimal yeast reproduction.
• Track fermentation visually: Starter should double or triple in size and show vigorous bubbling.
• Test float method cautiously: A floating spoonful indicates adequate gas production but should complement visual observation.
Also Read:- How to Read a Tape Measure (Complete Beginner-to-Pro Guide)
How to Feed Sourdough Starter Without Discarding

Feeding sourdough starter without discarding minimizes waste and allows sustainable starter maintenance. This method gradually increases starter volume while maintaining microbial balance.
This approach is ideal for bakers who frequently bake or prefer zero-waste practices.
Controlled feeding and careful portion management are essential to prevent overgrowth.
Sustainable Feeding Without Discarding
• Reduce feeding quantities: Use smaller starter portions to avoid excessive buildup.
• Use discard creatively: Incorporate excess starter into pancakes, crackers, waffles, and muffins.
• Adjust hydration carefully: Balance flour and water additions to prevent overly diluted fermentation.
• Monitor acidity closely: Regular feeding without discard requires more frequent refreshments to prevent sourness buildup.
• Use staggered baking schedules: Regular baking consumes starter naturally, reducing waste.
• Store surplus starter refrigerated: Refrigeration slows fermentation, controlling volume growth.
Also Read:- How to Make Chili: A Complete Step-by-Step Cooking Guide
How to Feed Sourdough Starter After Refrigeration
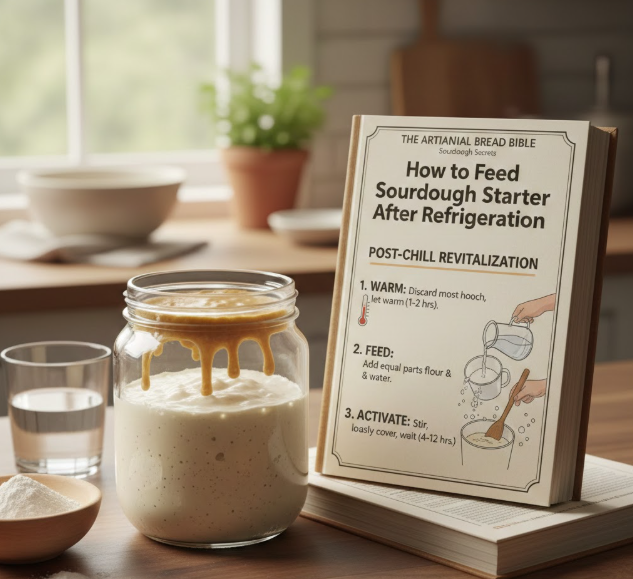
Feeding sourdough starter after refrigeration restores microbial balance and fermentation vigor. Proper reactivation ensures consistent baking results and prevents fermentation failures.
Gentle temperature adjustment, hydration control, and feeding frequency are essential for optimal recovery.
This method is ideal for weekly bakers or those maintaining long-term starters.
Post-Refrigeration Feeding Method
• Allow gradual warming: Avoid temperature shock by resting starter at room temperature before feeding.
• Discard surface liquid: Removing hooch reduces excess acidity and improves fermentation balance.
• Feed generously: Higher flour ratios encourage microbial resurgence and rapid activation.
• Use whole-grain flour occasionally: Whole grains provide extra nutrients for microbial recovery.
• Repeat feeding cycles: Two to three consecutive feedings restore full fermentation strength.
• Observe aroma and texture: Healthy starter smells mildly tangy and shows elastic, bubbly structure.
Also Read:- How to Cook Bacon in the Oven: Ultimate Guide
Best Flour Types for Feeding Sourdough Starter
Flour choice influences fermentation speed, flavor, microbial diversity, and bread quality. Selecting proper flour ensures consistent feeding success.
Different flours offer varied nutrient profiles, affecting yeast and bacterial growth.
Understanding flour properties helps optimize feeding strategies.
Recommended Flour Options
• Unbleached all-purpose flour: Balanced protein content supports steady fermentation and neutral flavor.
• Whole wheat flour: Rich in nutrients and enzymes, boosting microbial activity and fermentation speed.
• Rye flour: High enzymatic activity accelerates fermentation and strengthens starter vitality.
• Organic flours: Lower chemical residues promote healthier microbial ecosystems.
• Stone-ground flour: Preserves natural minerals and nutrients essential for microbial nourishment.
• Blended flours: Combining flours improves fermentation stability and flavor complexity.
Common Feeding Mistakes and How to Avoid Them
Mistakes in feeding sourdough starter can weaken fermentation, disrupt microbial balance, and compromise baking results.
Understanding common pitfalls helps maintain starter health and long-term reliability.
Proactive troubleshooting ensures consistent success.
Frequent Feeding Errors
• Overfeeding: Dilutes microbial populations, slowing fermentation.
• Underfeeding: Causes excessive acidity and weak yeast activity.
• Using chlorinated water: Inhibits beneficial bacteria and yeast growth.
• Ignoring temperature control: Extreme temperatures disrupt microbial balance.
• Inconsistent feeding schedules: Leads to unpredictable fermentation behavior.
• Using low-quality flour: Reduces microbial nourishment and fermentation efficiency.
Conclusion
Mastering how to feed sourdough starter is the foundation of exceptional sourdough baking. With consistent feeding, proper hydration, and careful observation, you can maintain a powerful, healthy starter capable of producing bakery-quality bread at home. By applying the detailed methods in this guide—including refrigeration feeding, scale-free feeding, waste-free feeding, and pre-baking preparation—you ensure long-term starter success and baking excellence.
FAQs
How often should I feed my sourdough starter?
Daily feeding at room temperature or weekly feeding under refrigeration is recommended.
Can I feed sourdough starter with whole wheat flour only?
Yes, whole wheat flour supports robust fermentation and microbial diversity.
What is the best water temperature for feeding starter?
Lukewarm water around 24–27°C ensures optimal microbial activation.
How long after feeding is starter ready for baking?
Typically 4–8 hours, depending on temperature and feeding ratio.
Why does my starter smell bad?
Strong odors indicate over-fermentation, requiring immediate feeding and possible discard.
For More Update Visit: VallayTaxNv